coreplus API

The coreplus API provides access to appointment booking related end points, such as clients, practitioners, availability slots and appointments. It is a RESTful API, which utilises the HTTP verbs for creating viewing objects.

If you are a developer looking to create an external consumer server to server application for your coreplus clients, then by signing up for a sandbox account you will get access to your own trial coreplus account on our sandbox server with authorisation credentials.

If you have any questions regarding the API documentation, please do not hesitate to contact us at integrations@coreplus.com.au

Setup your account with some data to query

Now you’ve created an add-on in coreplus which allows your API access to query the coreplus account data, you will need to create some data to query. In the following steps we create a practitioner’s schedule and enable it to be available through your add-on application.

The summary of steps be followed are:

  1. Create appointment types
  2. Map appointment types to practitioner specialties
  3. Set a practitioner’s profile to “Publish” for API accessibility
  4. Create a practitioner schedule and set it to be accessible through the API

You may need to repeat some of, or all of these steps for each practitioner to be published. In these instructions we assume you’ve already created your intended users / practitioners, but if you require information on creating users please follow this product help centre link to add users. When adding new users as intended practitioners, make sure you set the access as Case Manager or Supervisor so they can be managed as a practitioner.

1. Make an Appointment Type

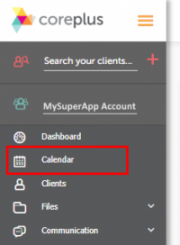
From the side bar click on the “Calendar”. It will open the calendar in either the same tab or a new tab depending on how your calendar settings have been set.

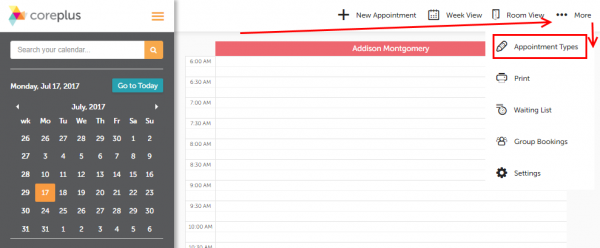
From the calendar go to the “More” button and then the “Appointment types” button within this menu

Add an appointment type if none exist. You will need at least one to create availability. For more information on creating appointment types, see the product support help topic appointment types


2. Map Appointment Types to Specialities

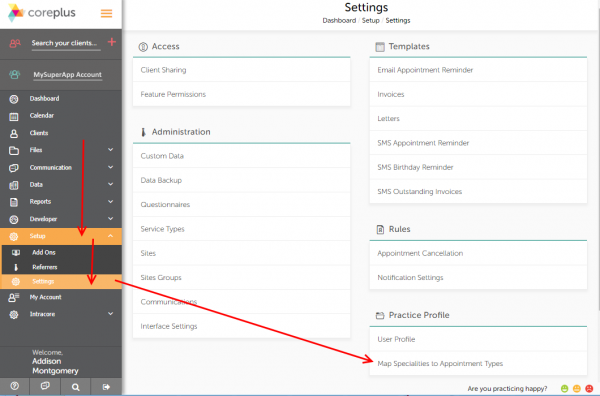
Navigate to Setup > Settings on the sidebar, then select “Map Specialities to Appointment Types” .

Navigate to specialty mapping

In the mapping window, map your newly created appointment type or existing appointment types to a specialty. The specialties are consulting specialties which you may assign to your practitioner(s) in the next step. You should use the specialties that you intend to assign your practitioner(s). For more information on specialty mapping see the help center topic on mapping specialties.


3. Setup and Publish the Practitioner’s Profile

The practitioner’s that you wish to query through the API will need to have their profiles set to “Published” status. If this is not set, you will not be able to retrieve this practitioner’s information through the practitioner api end point, and you will not be able to publish their associated availability schedules for querying through the AvailabilitySlot endpoint.

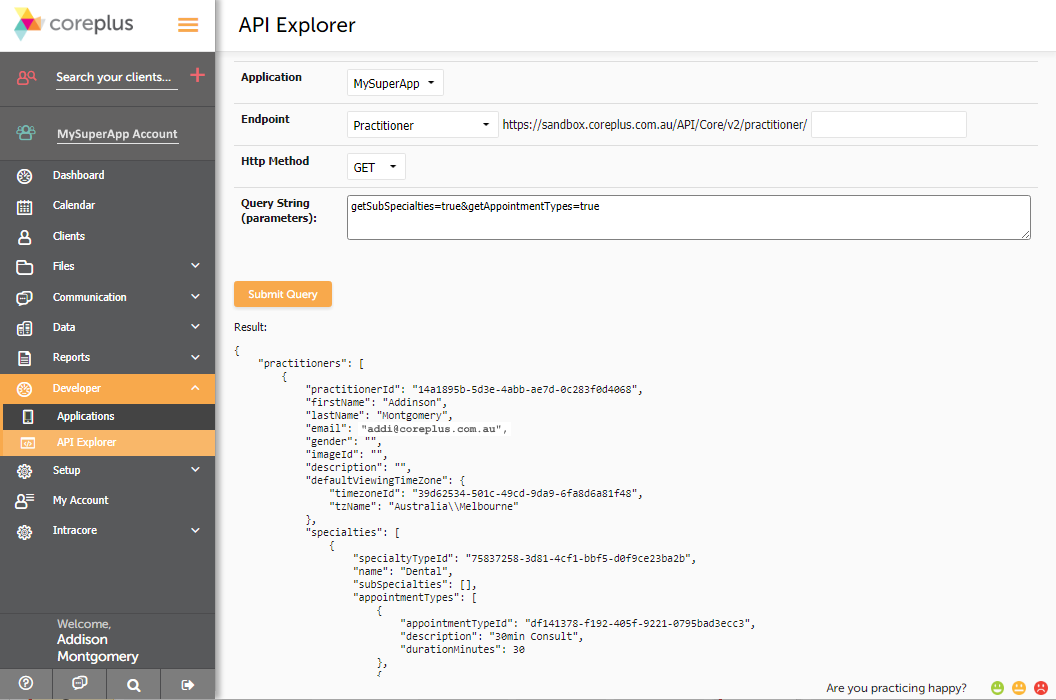
To “Publish” a practitioner, on the sidebar go to  Setup > Settings > User Profile. Choose the appropriate user from the user list drop down, fill out the profile details, select the appropriate specialty (which you mapped appointment types to in the previous step) and then tick the “Publish” tick box and save. Once a practitioner has been published, you should be able to query the practitioner information through the API explorer and your API connection. You may need to allow up to 5 minutes for the endpoint cache to update for this endpoint.

Navigate to user’s profile

For more information on setting up the user’s / practitioner’s profiles see the help centre topic on setting up practitioner profiles

API Explorer, querying the practitioner endpoint


4. Create a practitioner schedule and publish it

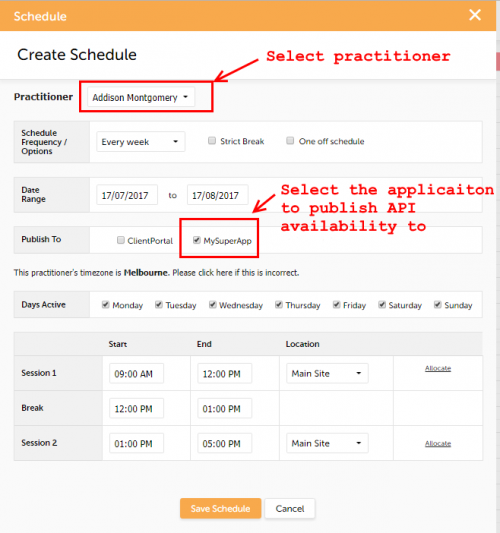
Return to the calendar and click “Create Schedule”. Once you have the create schedule window open, create a schedule for your selected practitioner. For more information on creating schedule see the help centre topic set up availability schedules. To make the schedule available for API queries we need to select the application it will be published to.

Open Create Schedule


Set the schedule to publish to an application


At this point you will now be able to schedule availability through the API. You will also now have the ability to create clients and client appointments within the availability reported through the API.


You can find all of our help and step-by-step guides HERE.

Develop with us

Use the form to sign-up and start developing with coreplus today.


Please leave this field empty.